Tuesday, October 18, 2011

Kayak Frame Completed

I am a firm believer in securing most things on a boat with rope instead of bolts and screws, rope gives a small amount of movement and is easily adjusted and replaced and is less wear on the hull.
 After choosing which frame to use I dispensed with the wood as much as possible to cut down on weight. I placed plastic tubing underneath the frame to give it a level foundation. I then secured the frame to the plastic tubing by way of drilling holes in the frame and tubing and tying it with a plastic line. I tied the tubing to the safety rope which runs along the kayak hull. The tubing is only to give the frame a steady base when heeling. I then secured the frame to the hull by tying it down firmly with bunji. When secured I pulled and tugged at the frame in different directions to assimilate heeling, the kayak moved and the frame stayed secure.
Later, I secured the frame firmly to the hull with a better and more tighter strapping system. Also I inserted the mast and ran a line from the spreaders through the mast head and down to the other spreader this stopped the mast from falling out in a capsize. I pulled at the mast and the kayak moved but the frame stayed rigid. I felt satisfied the frame is ready for the sail.

Thursday, October 13, 2011

Kayak Rig: Work in Progress

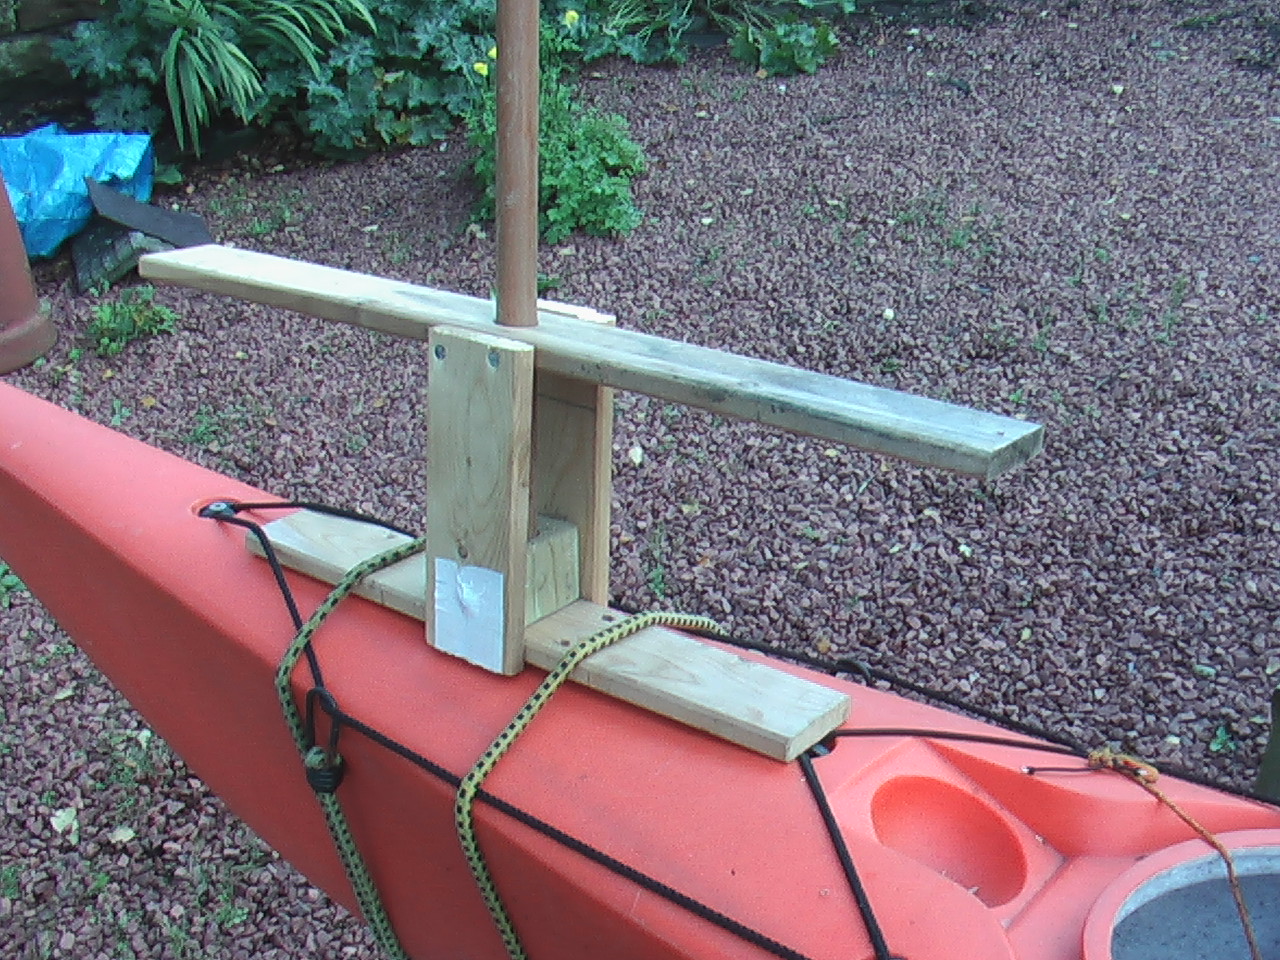
The idea of drilling a hole in the deck to insert the mast is not an option for me. I prefer decks to be as water tight as possible. So the idea is to erect a frame on the hull so the mast can be set into it and left there while kayaking. Since the sail will be hoisted to the mast, it is the sail which will be taken down leaving the mast erect. I started by using the remnants of my previous attempts of a frame. This wooden construction I used for the inflatable kayak but found it too heavy, but it is sturdy enough for the plastic kayak. I screwed the longer panel onto the top of the frame thus creating a 'box' like construction with a hole cut for the mast to go into and a wooden base with a hole drilled to insert the bottom of the mast. The longer top section can be cut to size or left its length to use as 'spreders' if rope stays are to be added to keep the tension of the mast.
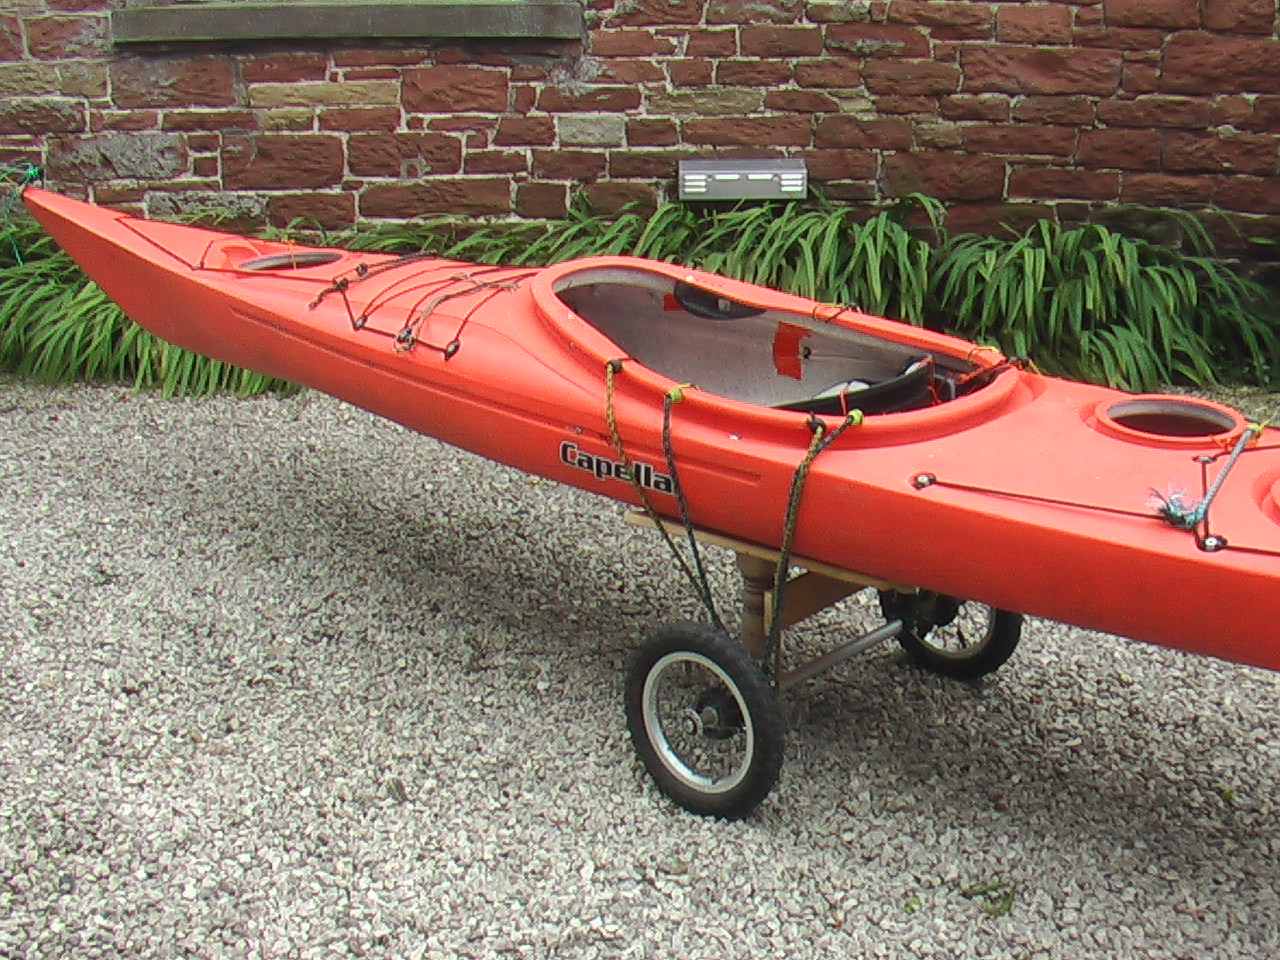
Now to choose where to fix the frame and in what position?
I positioned the frame at cross-section to the kayak. Resting above the compass well did give it a balanced secure position.
But with heeling I would have to make the base more secure than only bunji straps.

The next position I tried was to place the frame lengthwise to the kayak hull. This would give stability while Running with the wind, but it was not stable if the wind was beam on.
By placing strips of wood underneath the frame it gave a stronger and sturdier foundation the frame to rest upon the hull. The lengths could by cut to size later flush with the deck. Foam or rubber could be placed underneath these cross-sections to make it plush with the hull to stop the frame from moving.
The next position I tried was similar to the first with the frame at a cross-section to the hull but this time I added a 'V' shaped construction to strengthen the stability when on a Run. This position gave full contact with the hull and added to the strength of the frame.
This is the one I will probably use..but it is early days yet.

Tuesday, October 11, 2011

New Sea Kayak Wheels

As the previous wheels were too heavy and unstable I decided to make my own frame by turning wood and using the axle of the pram. I cut the joints at an angle so the boards, that the kayak hull will rest upon, sit even. I then fastened another piece of wood to strengthen the 2 legs. I up-turned the kayak positioned the frame and bunji strapped it onto the hull.

After some adjustment I tied it to the bike and positioned the frame in the centre of the kayak, it sat balanced without much weight on the bike frame. I gave it a test run for about 1 mile and it ran very well, it bounced less than before and felt sturdy.Turned easily and did not pull to much going up hill.

I will do a test run to the sea soon and if that is successful I will design another Crab-Claw rig for the kayak.

Wednesday, October 5, 2011

New Wheels for Kayak

It has been over 3 years since I got out the P&H Sea Kayak, the last time was my 4 day journey from Kippford to Gamelsby (Scotland to England). Then I bought my Hurley Felicity and I have been sailing and redesigning her rig (documented in this blog). But now I am turning my thoughts to sea kayaking once more. Partly to do with keeping fit and partly to do with transportation. I wish to see other shores that the Solway Coast and I am not getting out far enough with the Hurley due to our strong winds that we have had for the past few years. Also another factor is I added a sailing rig to my inflatable kayak and this worked fine so I am now thinking to add one to my Capella sea kayak and explore the coast line closer. In a few weeks I will be taking down the mast on the Hurley and mooring her for the winter so the Capella will be in use once more. Since I can transport the 16ft sea kayak by bike I have been making a new frame for her and I got hold of a good set of wheels which turn well due to ball bearings in the axle. This will make it alot easier to transport by bike to the coast. I got the whole frame today and I have been thinking what bits to cut off and what to keep. i think i will take most of it off and keep only the back axle and turn some wood so it can be slotted into the axle base. From this I can add bits to support the hull of the kayak.
The problem with the frame was the height and the weight, it was too high off the ground and able to tip over in high winds, also the whole weight was too much to store.